How to Make Your Own Brownie Pops at Home
Brownie pops are taking the confectionary world by storm! Learn how to make ooey, gooey, delicious and chocolatey brownie pops at home with this recipe.
Oct 27, 2011
The holidays are upon us and if you are looking for creative treats to bake at home, consider one of our favorites – the brownie pop.
It’s a well-known truth that for the last few years, birthday parties, weddings and bake sales have been all about the cupcake. Scores of cupcake bakeries with cute names and even cuter interior décor have cropped up all over towns and cities across America, but sometimes cupcakes get too much attention. It’s time the cupcake let someone else have a turn.
Enter the Brownie Pop. It should be said that we’ve been indulging in these decadently gooey, chocolaty, fudgy delights in their unpolished, rudimentary form for years. The fudge brownie has been doing the rounds since the late nineteenth century, when it was purportedly invented in the kitchen of the Palmer House Hotel in Chicago, circa 1893. Some people claim the dessert originated in New England, and there’s not really any way of verifying either theory.
In any case, recipes for the fudge brownie started to appear in cookbooks from the beginning of early twentieth century - we’ve been enjoying fudge brownies all this time. They are just that good. They never last long at a bake sale, and a full slab of the baked goodness can become half a slab before it’s had time to cool from the oven.
The job of bringing dessert to a dinner party is always fraught with competition. While a tray of gorgeous cupcakes with pink frosting and silver cachous will be placed with pride on the dessert table for all to see, the humble brownie will often be whisked away to the bench by the sink to make an appearance only at the end of the night.
Well, the times are a-changin'. The brownie will hide in the shadows no more! Dressed to impress, brownie pops are the baked treats that you can display with pride at the dessert table. They make wonderful gifts that sit on colleagues’ desks all day only to be gobbled up in the car on the way home to avoid potential requests to share, and they make afternoon tea with the girls extra special.
But the Brownie Pop is elusive. It is the item that everyone goes for at the patisserie, but no one dares try to recreate it home. We’re just being intimidated by good looks again. The truth is, Brownie pops are really very easy to make and require only a few steps. We’re going to share with you the most decadent chocolate fudge brownie recipe in the world. Then we’ll tell you how to turn that slab of heaven into Brownie Pops to die for.
Ingredients:
You are going to need:
- Ingredients for the brownie recipe (see below)
- Popsicle sticks or extra thick wooden skewers
- Chocolate for melting
- Tiny bits of candy, sprinkles, shredded toasted coconut and crushed peanuts for decorating.
Ingredients for the brownie mix:
- 1 cup butter
- 6 oz unsweetened chocolate
- 2 cups white sugar
- 2 eggs
- 1 cup all-purpose flour
- 1 teaspoon vanilla extract
- 1/2 teaspoon salt
Directions:
Preheat oven to 350 degrees. Grease a 9-inch square baking pan AND line with baking paper.
Melt the chocolate in a hot water bath. To do this, you will need a glass dish and a saucepan. Cut the chocolate into pieces of a uniform size. Fill a large saucepan about halfway with water and heat until just simmering. Place the chocolate in the glass dish, and place the dish in the water bath. Be sure not to let any water get into the glass dish. Gently and constantly stir the chocolate with a rubber spatula or wooden spoon until completely melted. Always keep the heat low to avoid your chocolate becoming gritty (this happens very quickly!)
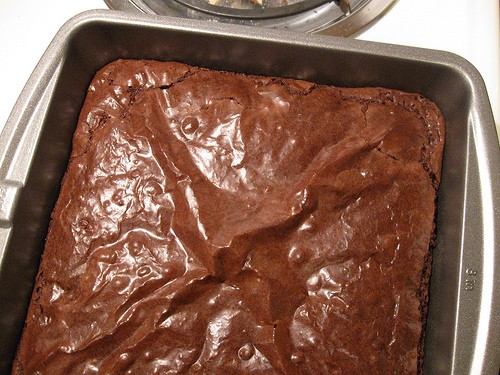
Melt butter and stir into chocolate mixture until completely combined. Stir in sugar. Set aside to cool for about ten minutes. Beat in the eggs and vanilla extract. Combine the flour and salt. Stir into the chocolate mixture. Pour the batter into the greased and lined pan and bake in oven 40 to 45 minutes. Cool in the pan and lift out with the help of the baking paper.
Cut the outer crusty part off the slab of brownie (this stuff will create dry bubbles in your pops). Then cut the slab into 1 inch to 1½ inch squares. You now have brownies. And incidentally, they’re pretty amazing brownies.
Now … to turn these babies into Brownie Pops!!
Instructions:
Step 1: Get Rolling!
Brush off excess crusty bits from the top of the brownies and roll each square into a ball. Moisten your hands with a little cooking oil to prevent them from sticking to your fingers and forcing you to eat your way out of the mess. If your brownie balls are still a little warm and soft, pop them in the fridge at this point to harden them a little, but take them out within ten or fifteen minutes to prevent them from becoming too hard to work with.
Step 2: Set Out Your Spangles
Line up cereal bowls of sprinkles, crushed nuts, shredded coconut, and candy pieces. Get creative with your candy coatings. Anything that will stick to melted chocolate works. (No, bacon is not a candy).
Step 3: Stick It to ‘em
When your brownie balls are firm but not hard, insert a popsicle stick or skewer into each one (if you are using skewers, be sure to cut the sharp end off). The stick needs to be inserted well into the ball so it doesn’t fall off when dipping it into the melted chocolate, or far worse, on the way to somebody’s mouth (devastating). Arrange on a tray with the sticks standing straight up. (You can gently tap the brownie ball on a hard surface to create a slightly flat side so the brownie stands on its own with the stick standing straight up. Return the tray pops to the fridge to become firm for another ten minutes or so.
Step 4: Take a Hot Bath
Meanwhile, melt the chocolate in a hot water-bath, using the same method as you did to melt the chocolate for the brownie mix.
Step 5: Dip
Pour the melted chocolate into a coffee mug. The chocolate needs to fill the mug enough so that the brownie can be completely covered when dipped. Dip the cooled brownie pops in the melted chocolate to seal the brownie. A little chocolate at the base of the stick is good!
Step 6: Say It with Sprinkles
Allow the chocolate to set a little, and roll the pops in each bowl of decorations as your creativity dictates. If rolling isn’t working, pick up the toppings and sprinkle them onto the brownie pop by hand. It is a good idea to use only one topping per brownie pop. Set them back on the tray and allow to cool completely. It’s that easy!
If you want to get fancy, melt white chocolate in the same way you melted the milk chocolate and drizzle it over the milk chocolate to create patterns or streaks. Just be sure to allow the milk chocolate to completely harden before adding the white chocolate.
Show off your brownie pops when entertaining friends these holidays. If you must cheat, leave it to the experts. Shari’s Berries Brownie Pops come in Halloween, Thanksgiving, Sports Season, and Christmas designs that are a little more complicated. But don’t try to pass these off as your own. You might just be called on to replicate them next year!
What’s your favorite thing to bake over the holidays? Tell us below!


