
Creative Dessert Table Ideas to Sweeten Your Next Event
Wanna make a spectacular dessert table? Here's how.
Sep 21, 2016
Basic Elements of a Dessert Table
There are no strict rules to setting up a dessert table, but there are a few things to keep in mind: theme, variety of desserts, sturdy plates and accessories like paper decorations.
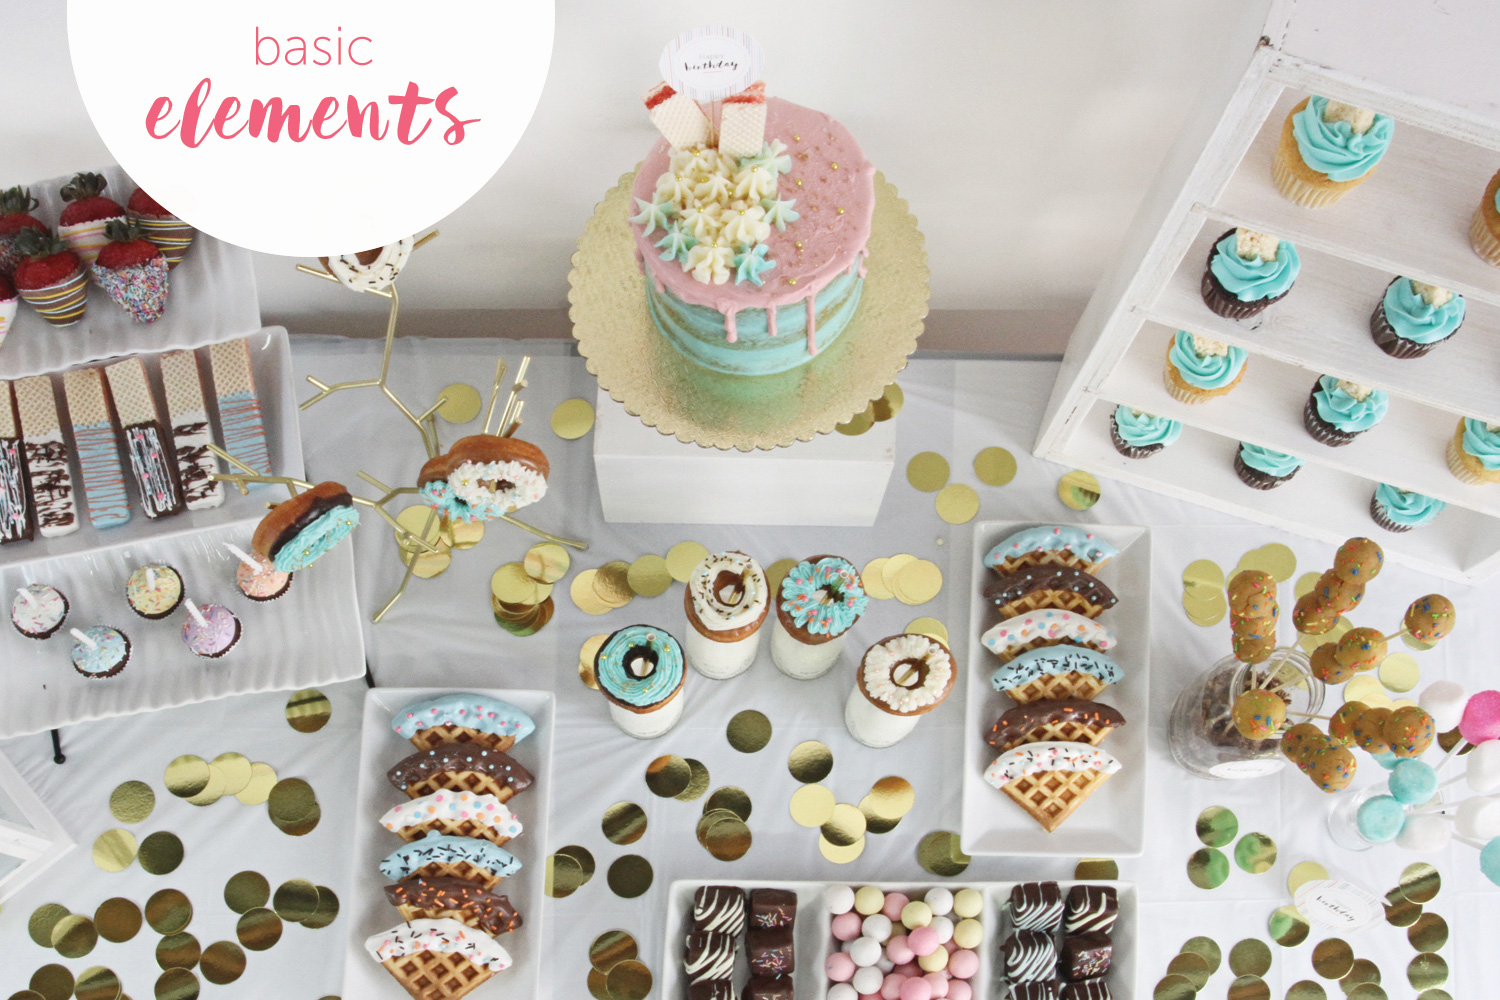
No need to clutter your sweets table. Keep the accessories simple and add style with waffles, donuts, cupcakes, cheesecake squares and more uniquely shaped treats. Need a delish brownie recipe? We've got you covered.
Step 1: Set Up Your Table
Sure, it’s sounds pretty simple to place desserts on a table but there are a few things you need to keep in mind.
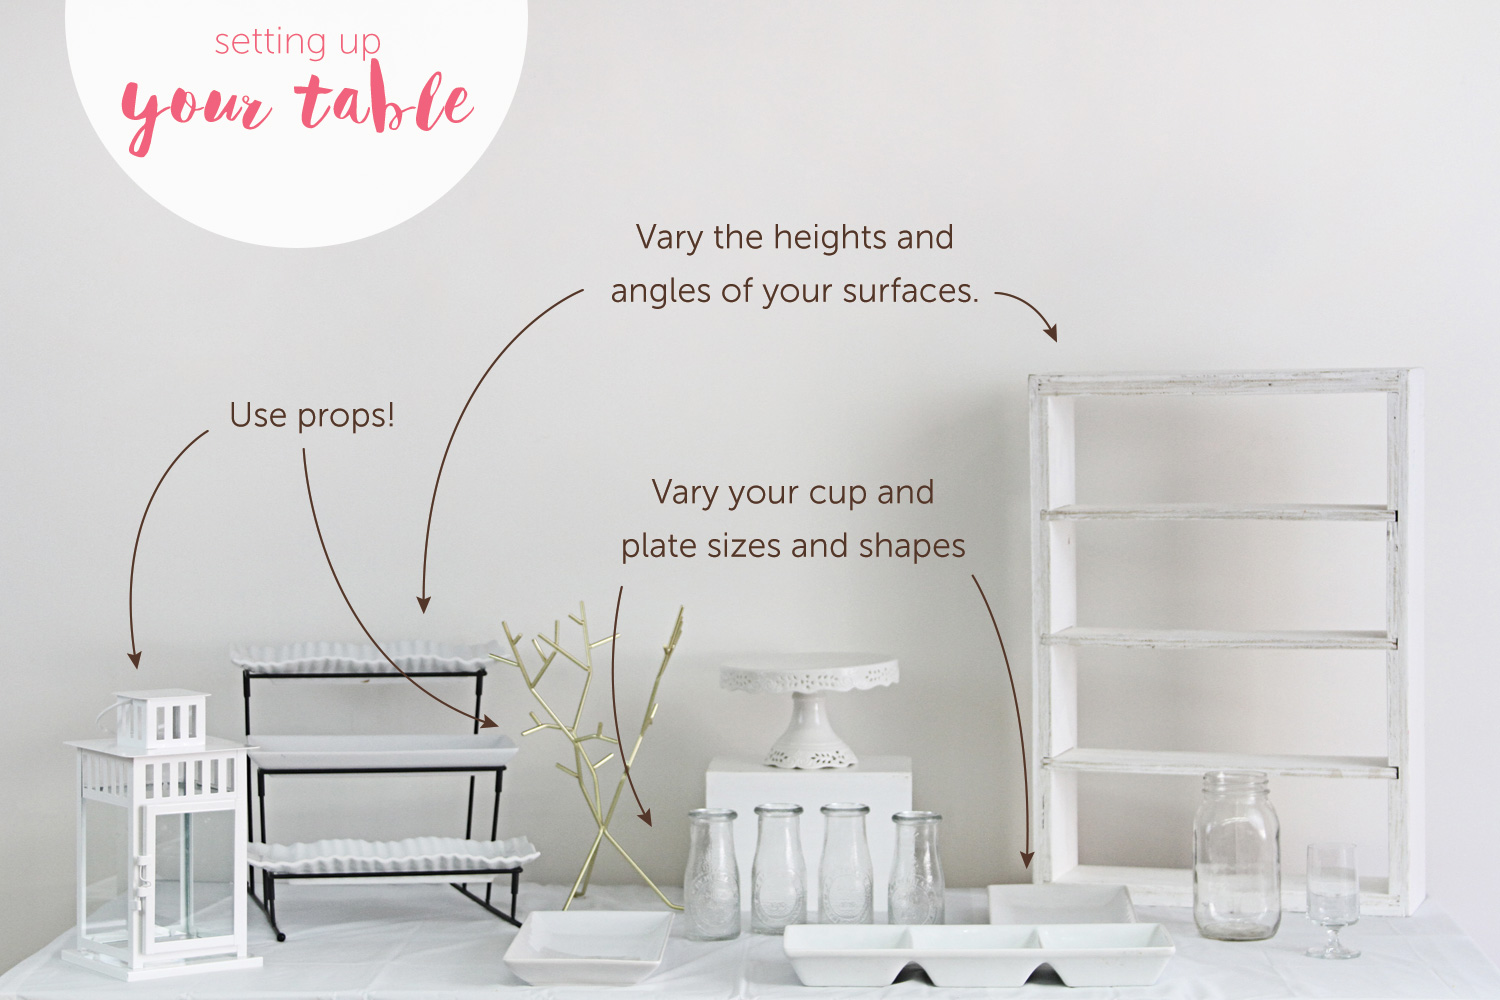
• Different heights and angles look stylish and allow easy access to all the desserts.
• Props fill in empty space. In our example below we used a metal branch, confetti and a lantern.
• Use a variety of plate and cup shapes. If you have a small cake, display it on a high stand so it doesn't get lost among the other desserts.
Step 2: Add Visual Flair
Now that you know the basics, it is time to dress this table.
• Choose plates that complement your color theme. For example, if your desserts are vibrant go with simple white or muted hues. If your desserts are mainly chocolate, colorful plates are a great accent.
• A variety of desserts is nice but make sure you consider the number of guests. More isn’t always better—you don't want too many leftovers. Or the temptation to finish them off yourself ...
• If it's an outdoor party, consider sweets that won’t melt or spoil in the sun.
• Spruce up your desserts and charm your guests by adding metallic straws and confetti or small banners.
Step 3: The Details
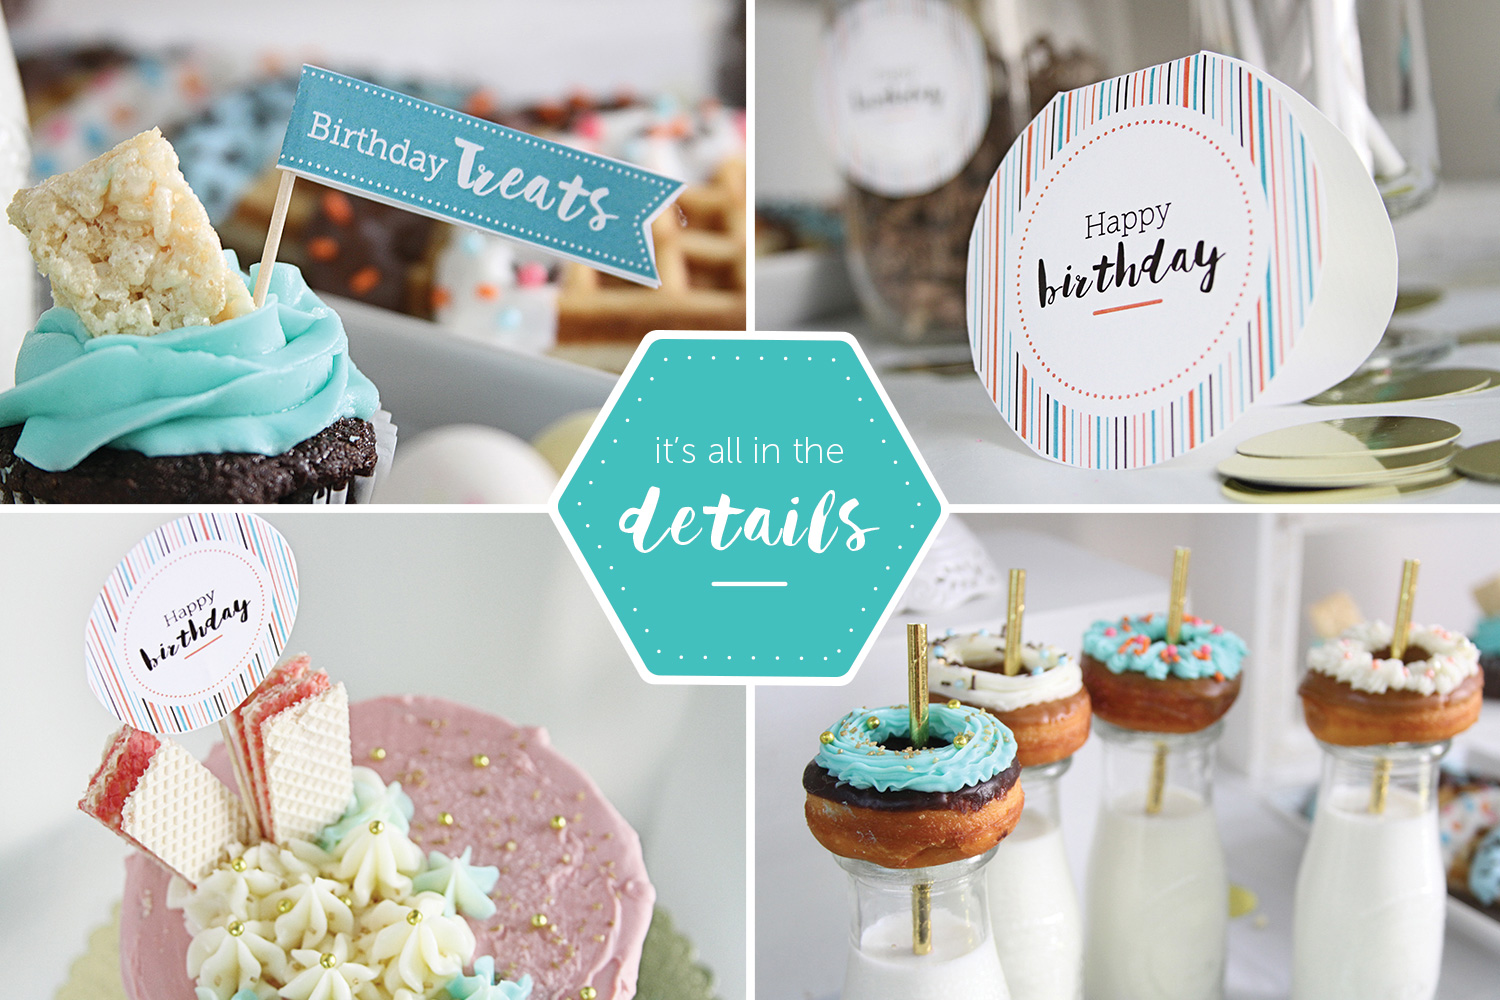
Little details take your dessert table to the next level. Not only are they inexpensive but they also help tie the party theme together. Label your desserts or simply write a sweet message. Printable cupcake labels, cake toppers and flags also add a fun element. Check out our printables below!
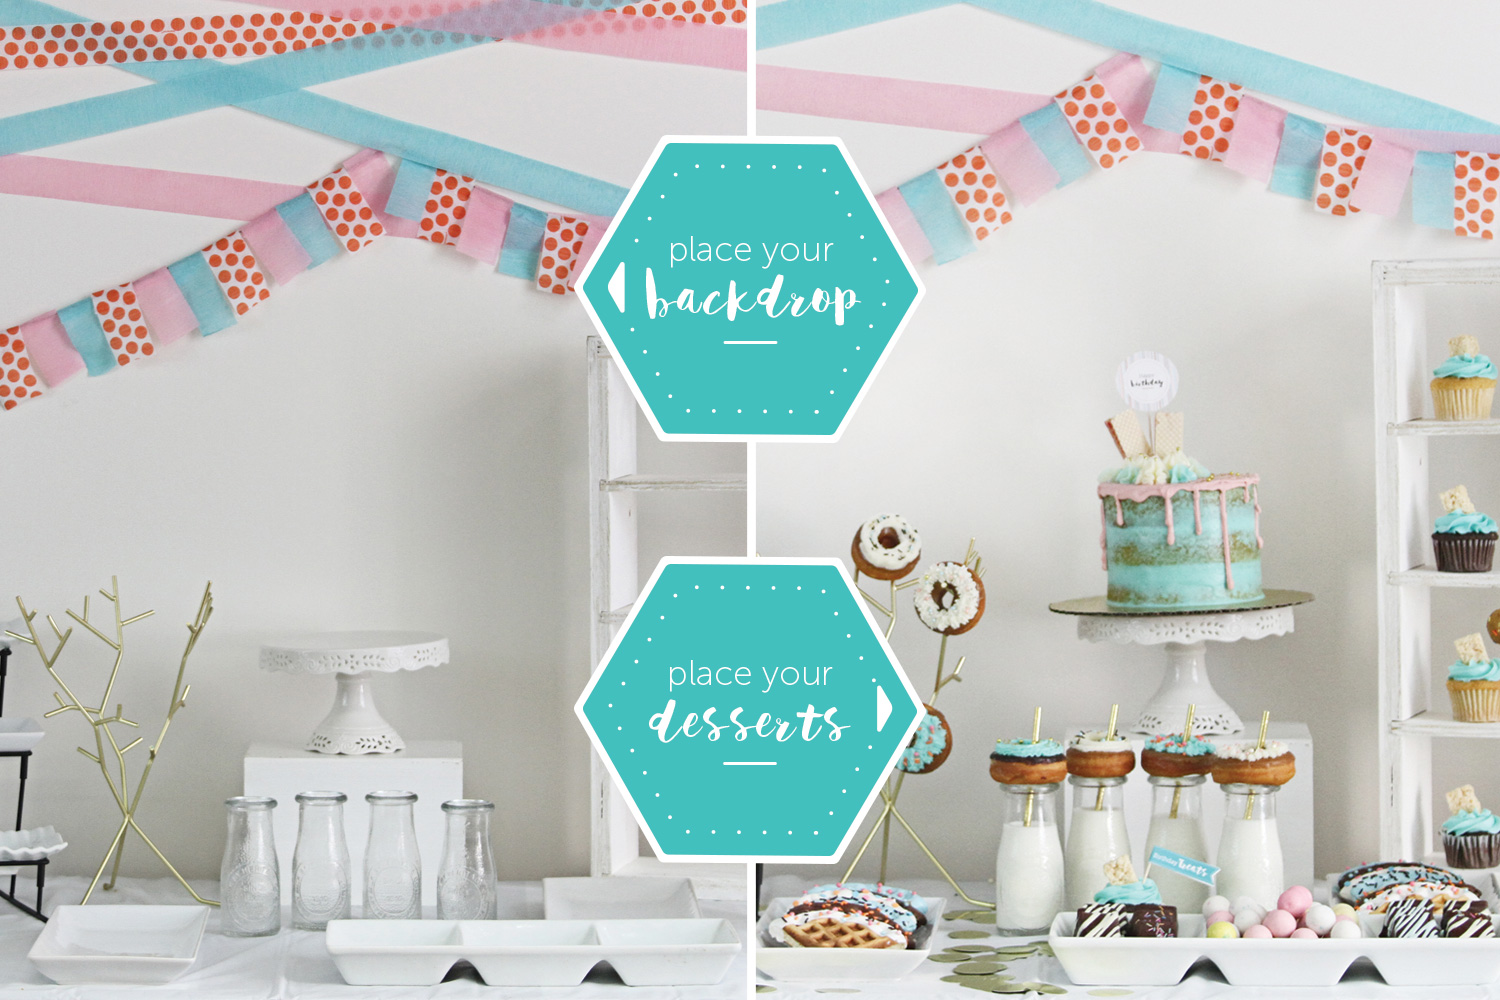
Step 4: Build Your Backdrop
Anyone can create an awesome backdrop! But, some designs require a little more time than others. Below you'll find three spectacular ideas for DIY backdrops. All of them were created in under two hours with simple and affordable supplies.
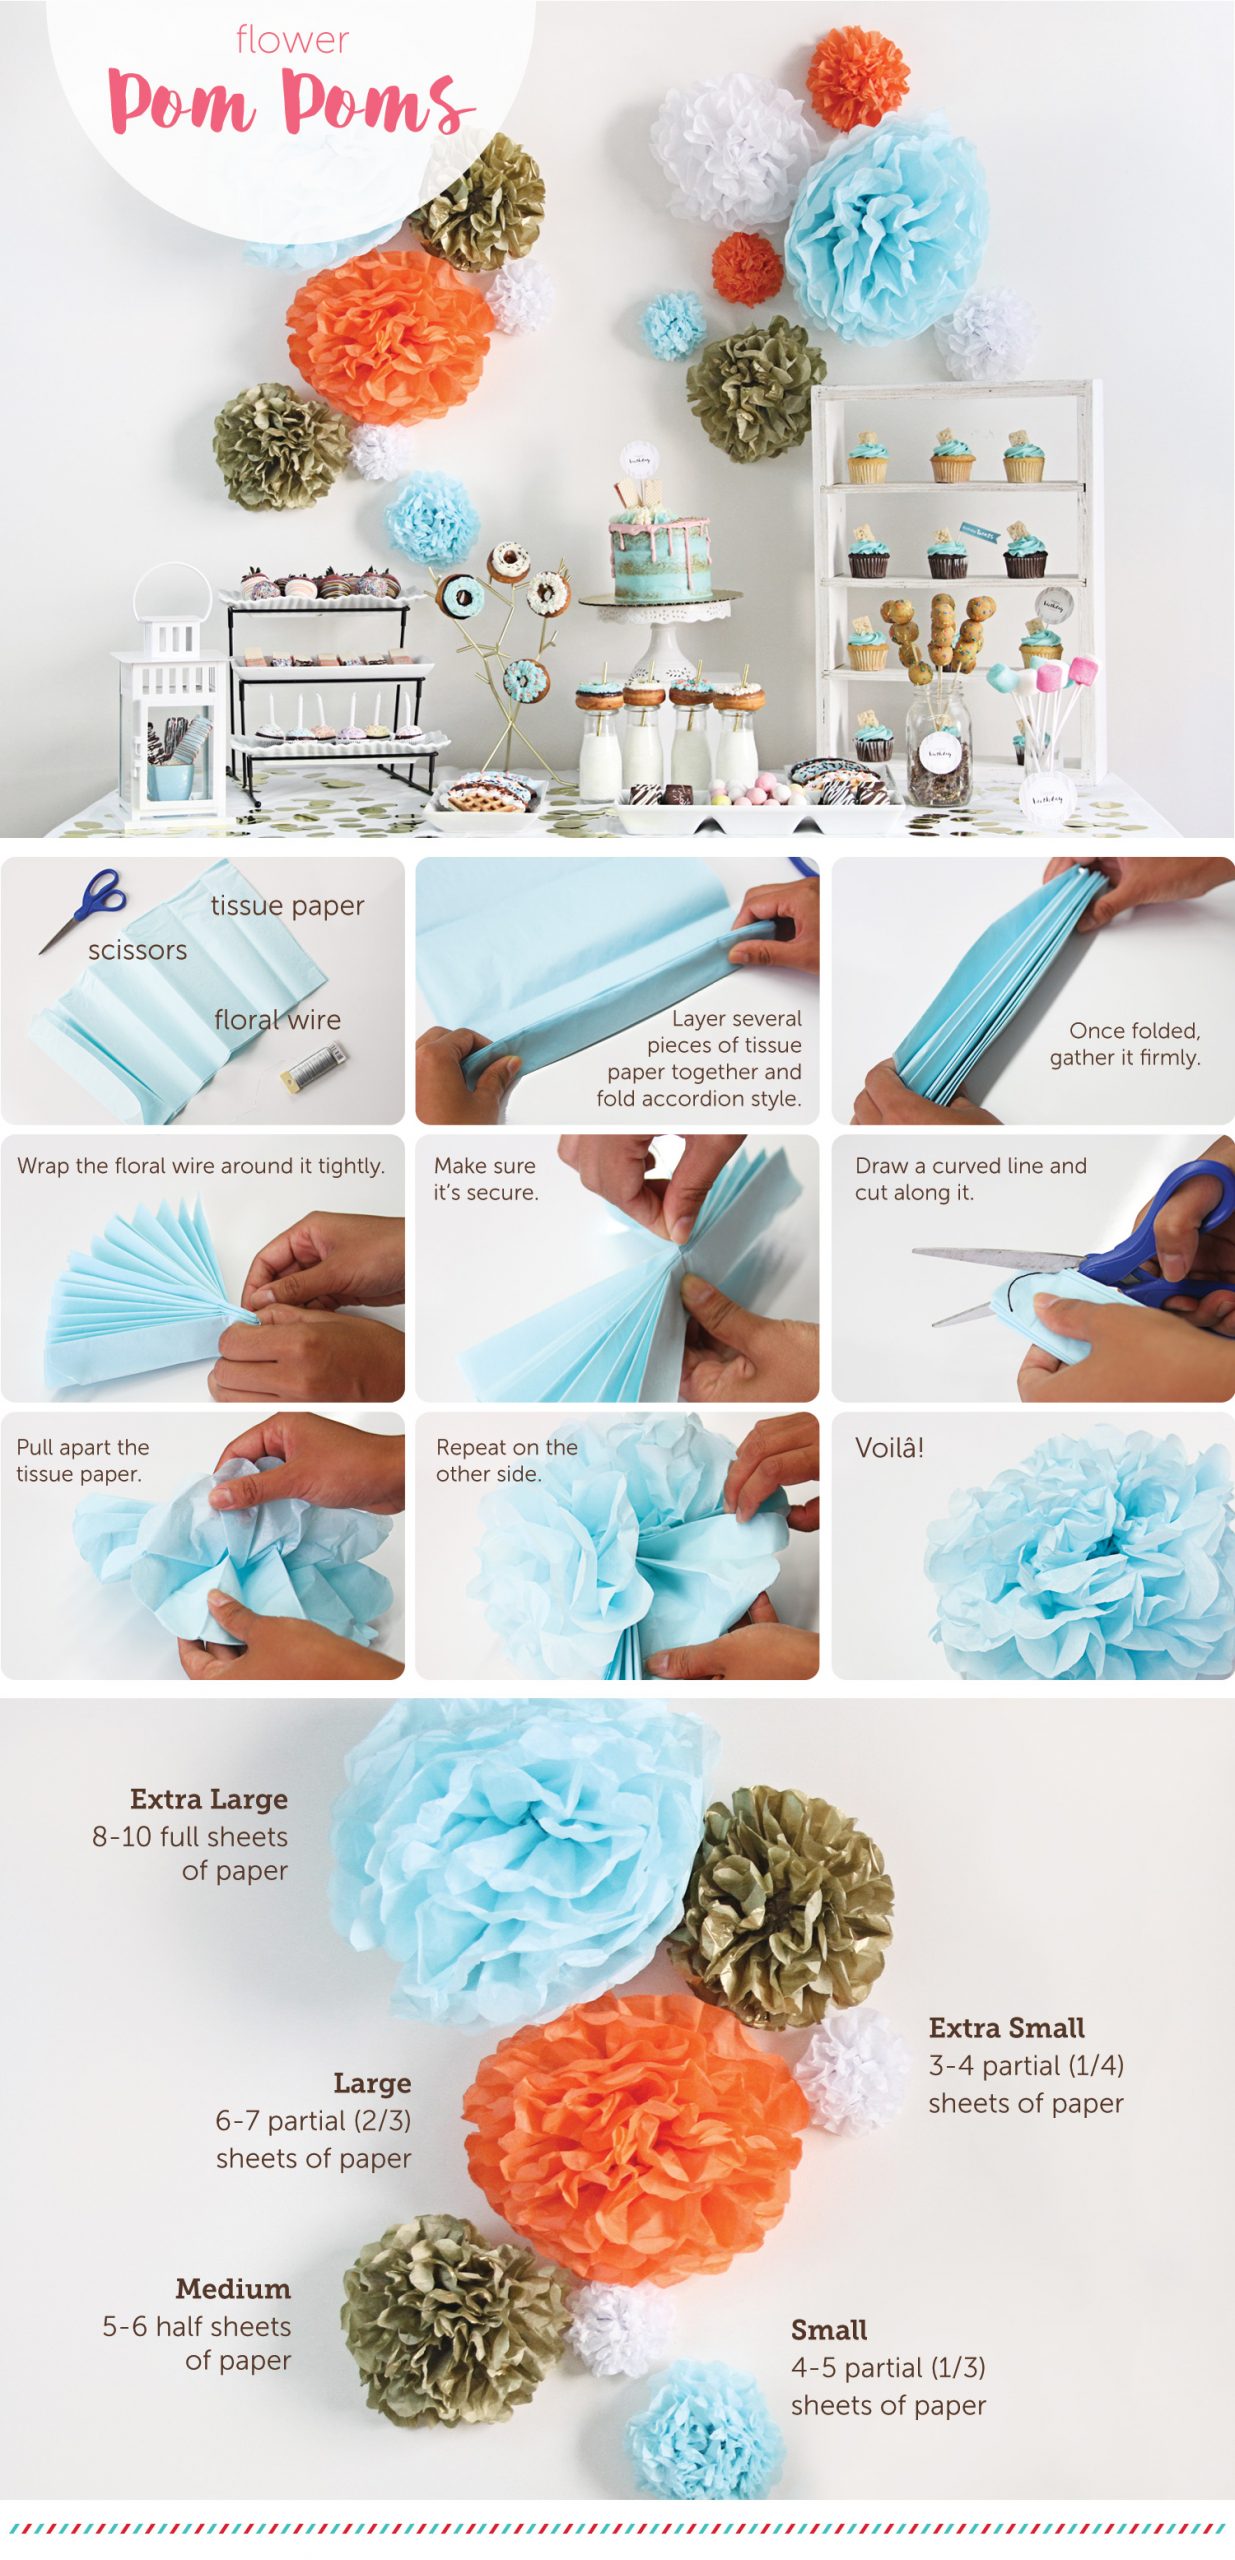
Pom Pom Theme
Flower pom poms are easy to make and add fun flair to any dessert table. Combine colors together and use patterned or textured paper. Don't worry if they get a little wrinkled, that's the beauty of tissue paper.
Estimated time: 3-5 minutes each. Now, let's get started!
Yarn Theme
You only need 4 essential items to build a yarn tapestry banner (yarn, dowel, glue gun and scissors) and it gives a bohemian look to any party. We used plain wool yarn for this, but feel free to play around with textures. Thank you to For the Love Of for teaching us this awesome DIY Yarn Tapestry.
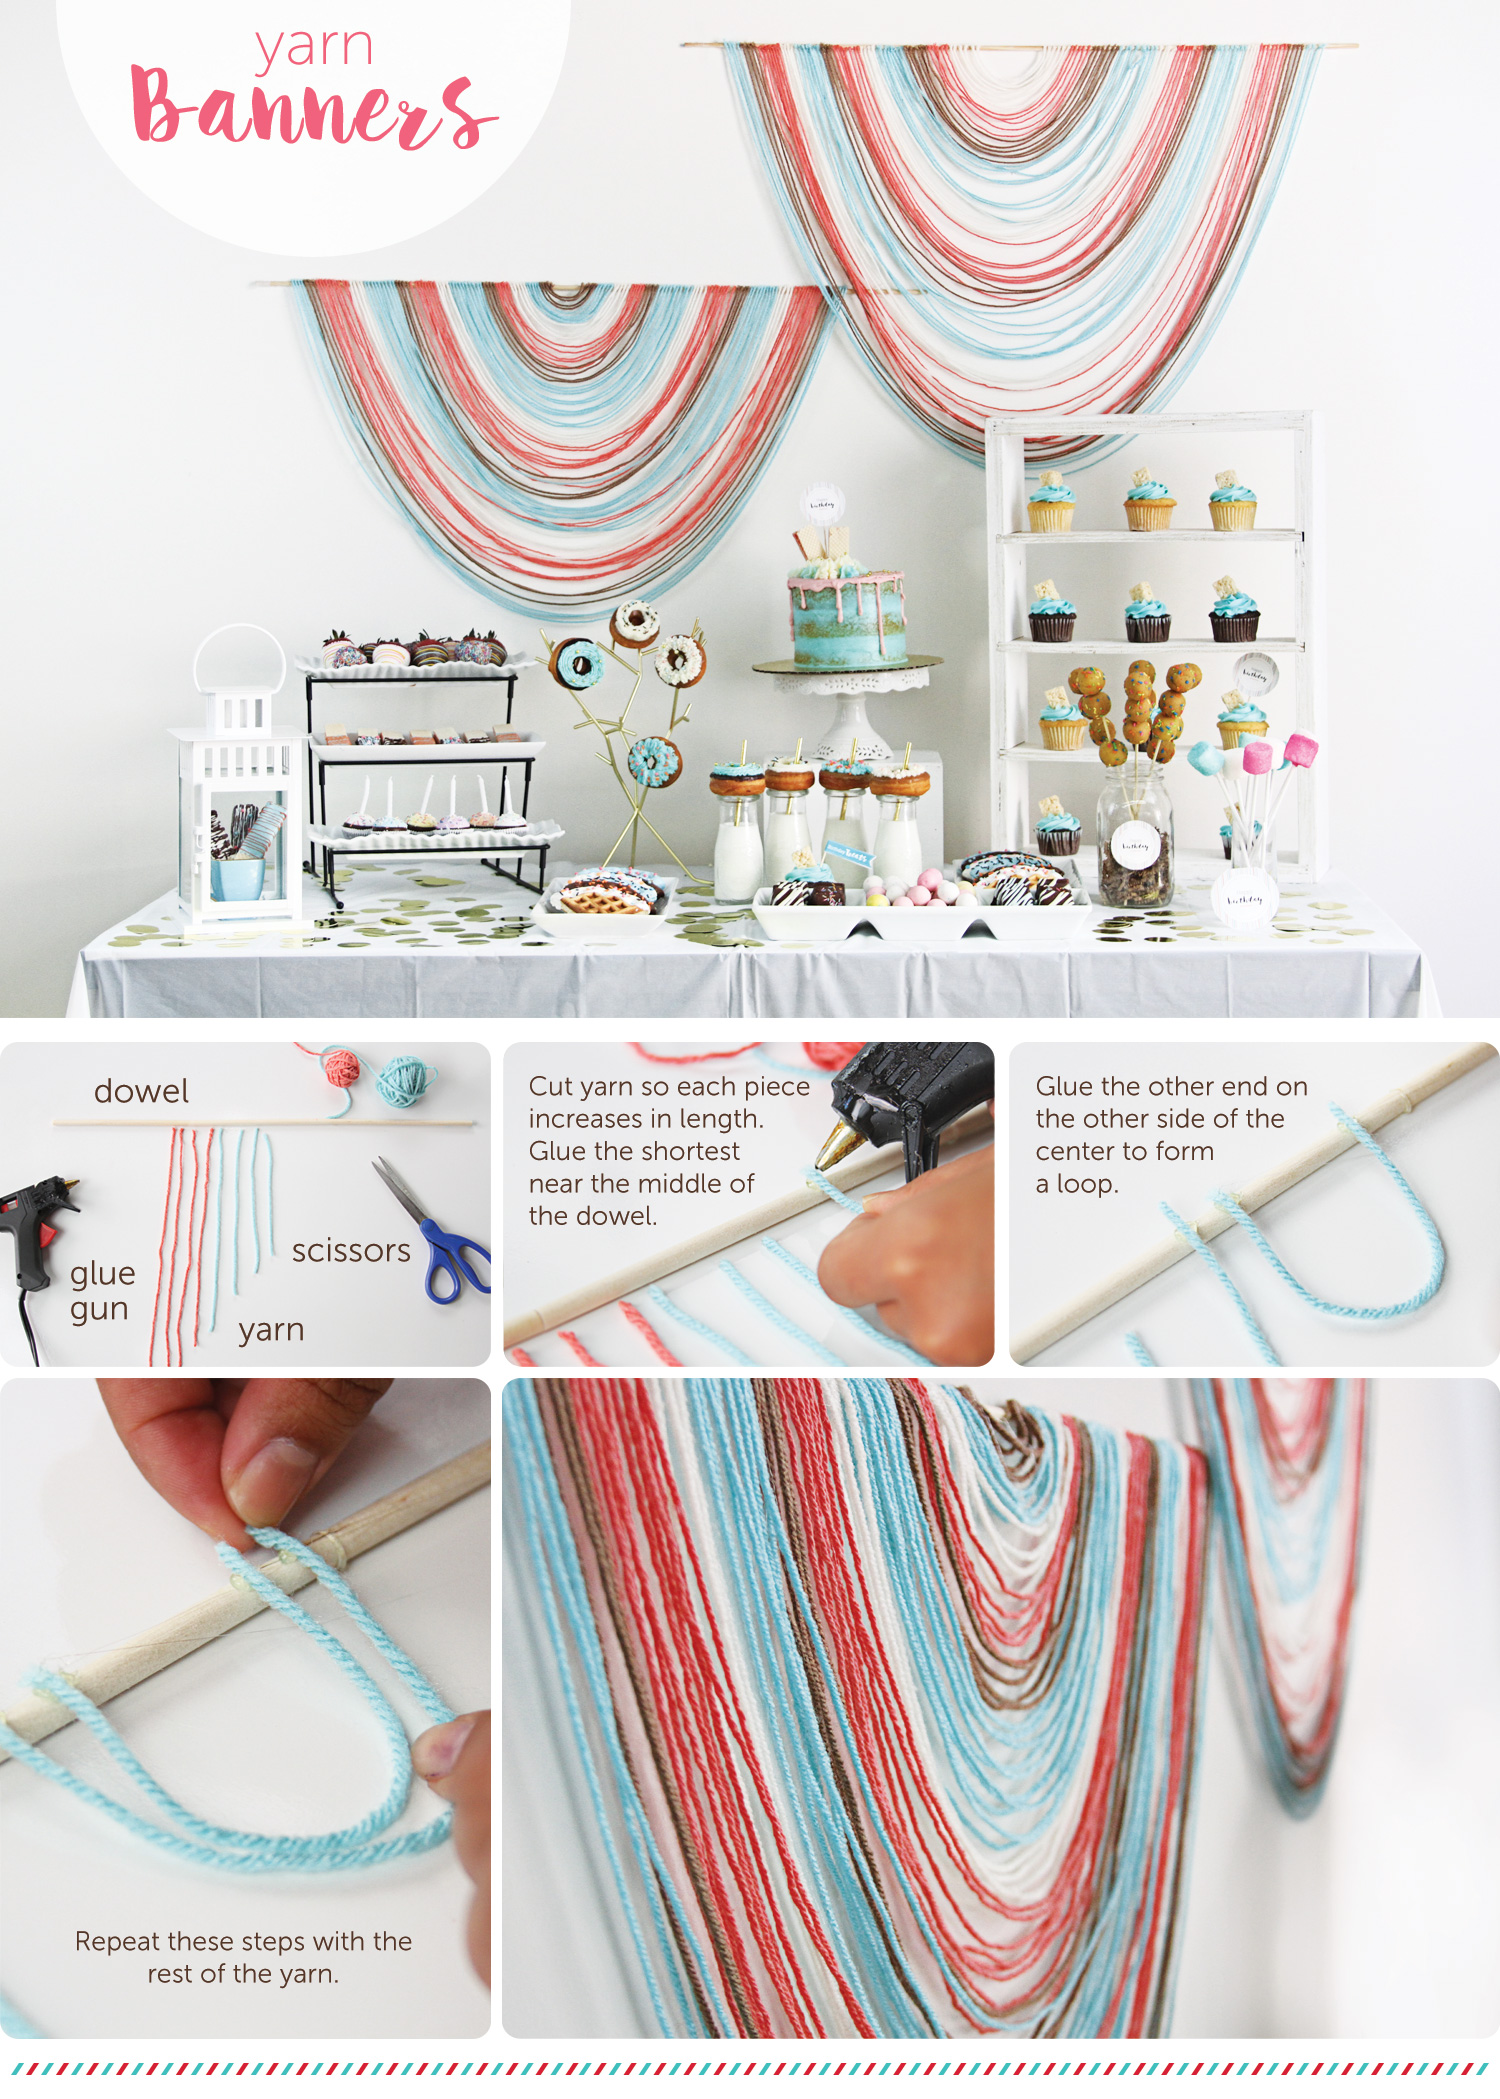
Estimated time: 1.5 hours. Here we go!
Crepe Paper Theme
If you're in a major time crunch, crepe paper is the way to go. Crepe paper comes in so many patterns that you can get really creative with it and it will look like you spent hours. You need four things for this banner: crepe paper, scissors, tape and twine.
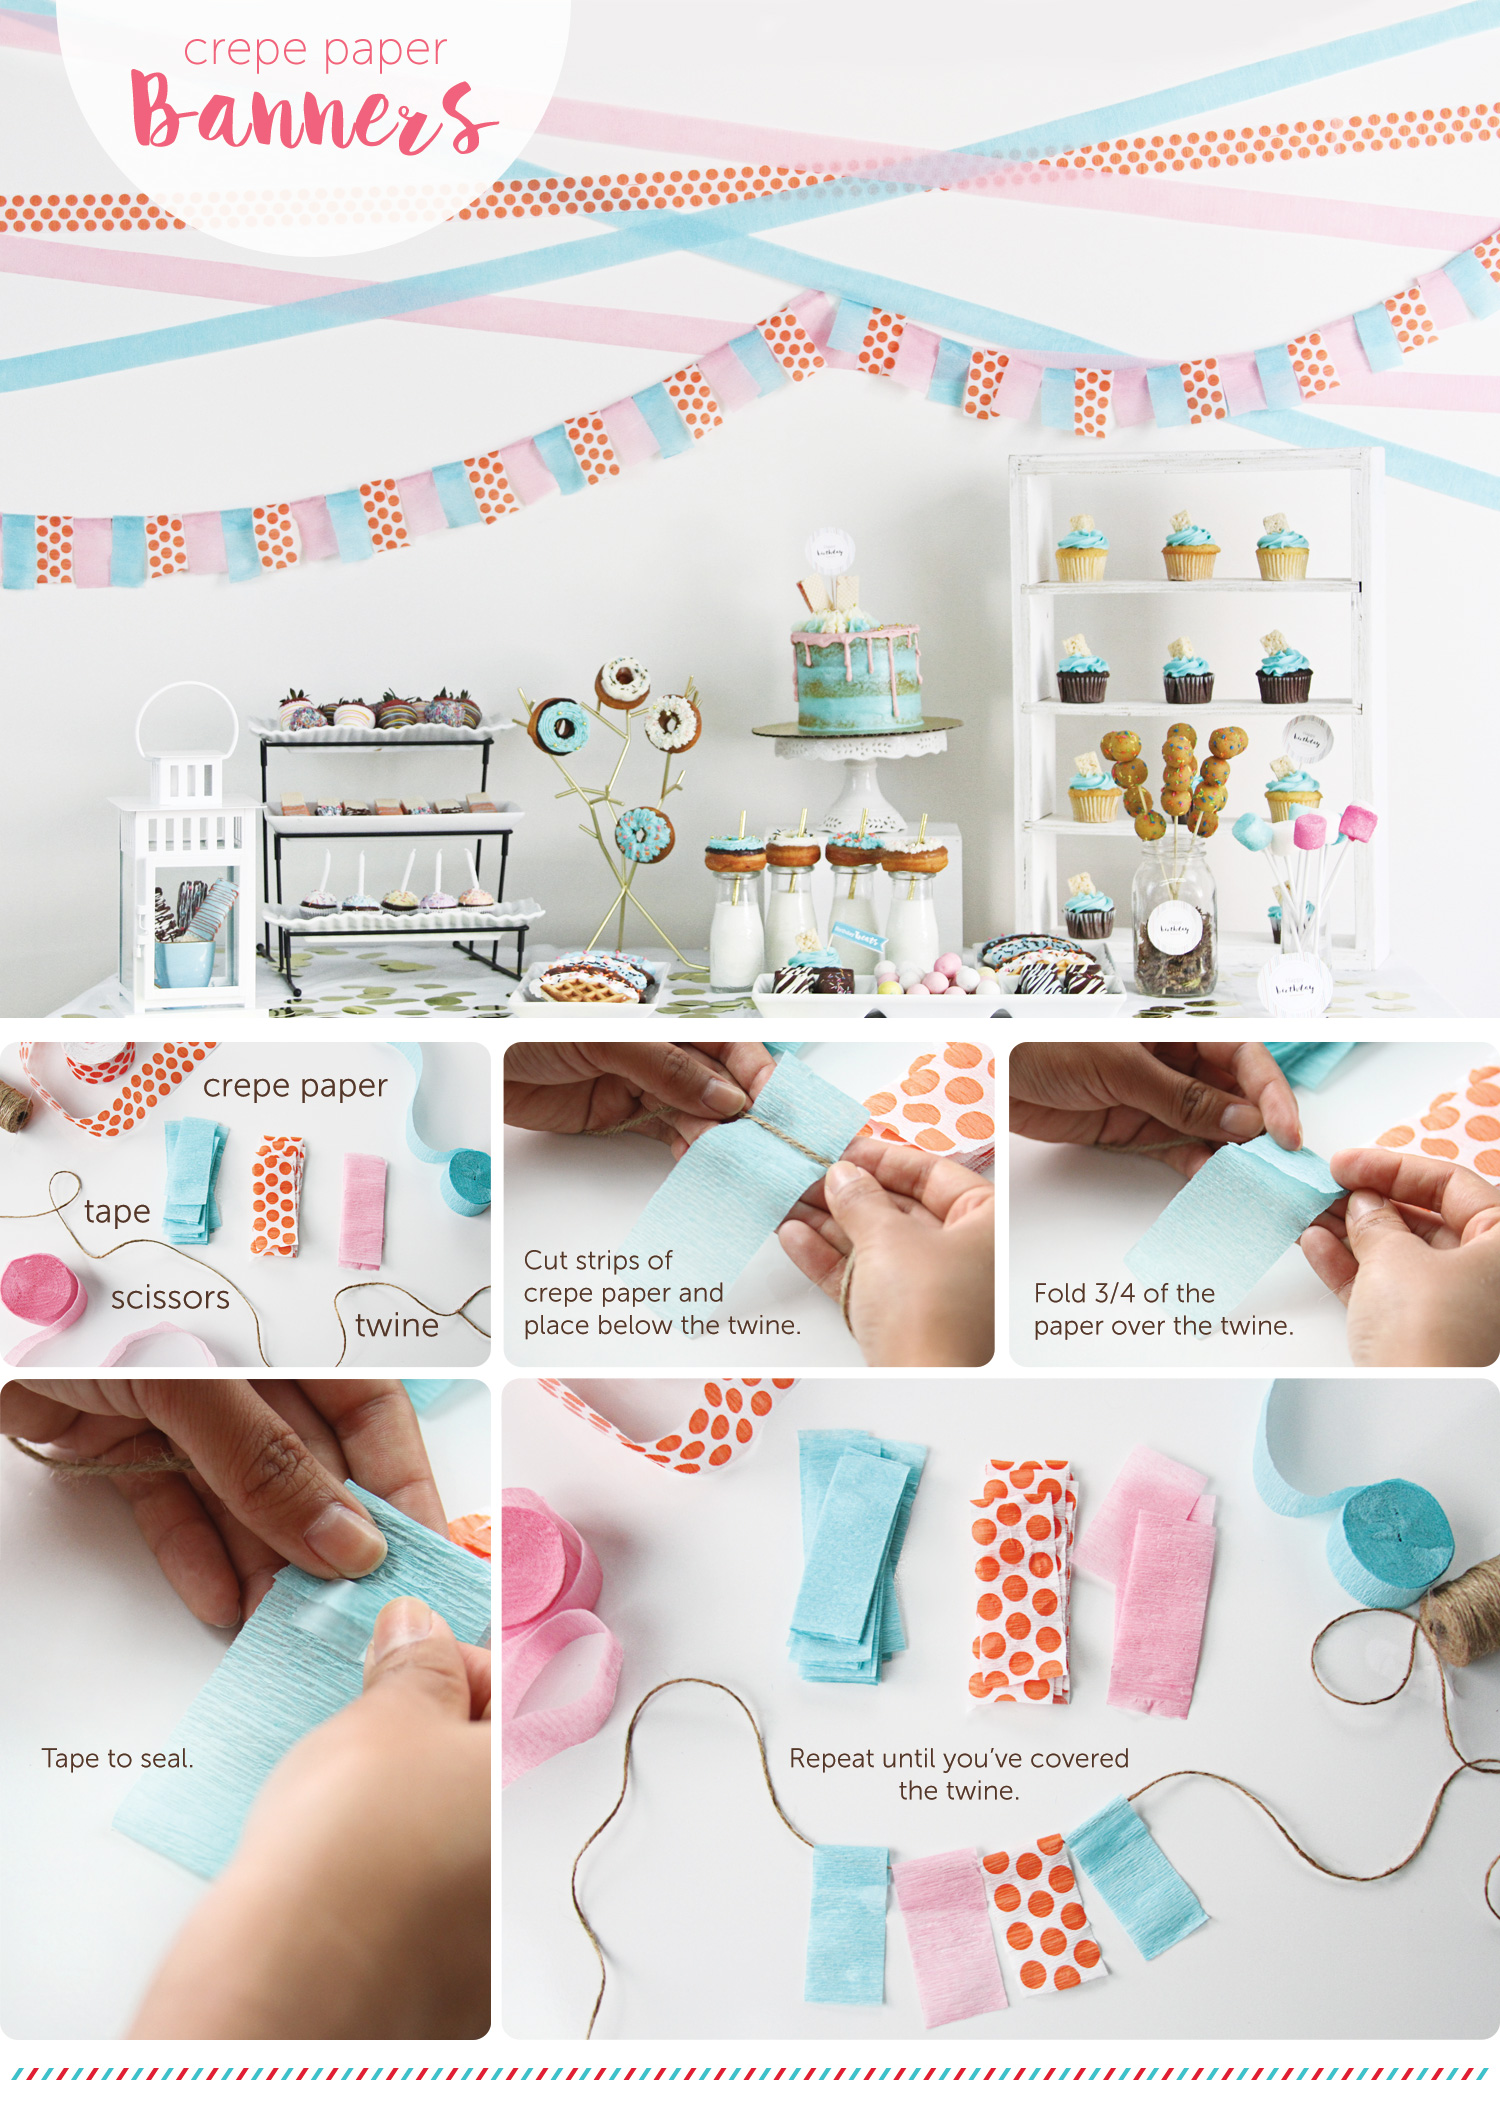
Estimated Time: 25 min. Ready?
Printables

Ready to Party?
Now that you're prepared with dessert table ideas, backdrop ideas and stocked up on birthday printables, which theme will you choose for your next party? If it's a birthday bash we've got some delicious ideas for some fabulous birthday treats.


